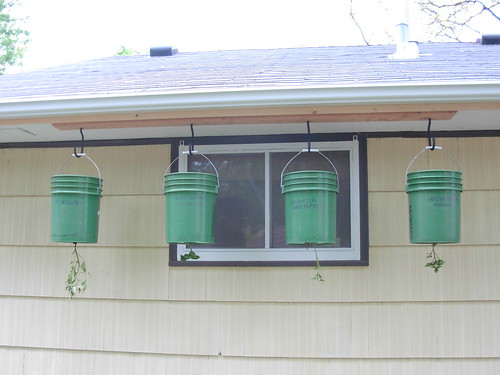
A colleague of mine from the AfroEco Group, who specializes in urban gardening, offered me this advice: "Do an upside-down garden. Take advantage of the sunny spot and keep your dog AND the squirrels away from your veggies." Throughout our lunch break, he gave me the basics.
I came home enthused and throughout the winter I was pumped to start experimenting with the upside down vegetables. Gerg was game, and helped with the logistics.
 This photo was taken on the first day.
-First, gerg made sure the house was structurally prepared for the extra weight.
- We drilled holes in the bottom of the buckets.
-Then we fed the plants through, roots pointing upwards. We wrapped moss around the roots to help hold the plants in place.
-Finally, we filled the buckets with good soil, hung and watered them.
We selected these green buckets, which were formerly pickle buckets at a local burger joint. We purchased them for $2 each. Because they were already food grade, we didn't have to worry as much about chemical residue. We scrubbed them well, and planted.
 This photo was taken on the 34th day.
-Large, strong hooks are in order. A 5 gallon bucket full of wet soil and plant roots isn't light.
-Strong, solid fascia boards are in order as well.
-We purchased a watering device with a longer neck, so we could water the plants while they were hanging. One advantage to the upside down bucket method is a lot less watering when it's dry outside.
The final result was 4 productive plants: 2 tomatoes, one pepper, and one basil. Go here to see more photos of the project. Not one tomato was stolen by a squirrel. Not one. BOOYAH!
[where: 55406]

No comments:
Post a Comment